Publish and Consume Messages Using RabbitMQ as a Message Broker in 4 Simple Steps 🐰

SOLID principles seem to be the foundation that most engineers tend to build their solutions on. Using message brokers can help you achieve these core principles.
Message brokers allow services and components to communicate directly, even if they were written in different languages or implemented on different platforms so it serves the Single-Responsibility Principle.
Also, Message brokers act as intermediaries, allowing applications to communicate without direct dependencies. They provide a common abstraction for message handling which helps serve another principle which is Dependency Inversion Principle.
Of course, not to mention that most microservices, domain driven and event driven approaches are heavily dependent on message brokers. And message brokers come in all shapes and sizes and a lot of popular tools can help you set up a nice intermediatory space for your messages. Some of these tools are PubSub+, Redis, Kafka, AWS SQS and more. Some of these are in the form of topics which have subscribers such as Kafka and AWS SNS and others are in the form of queues like AWS SQS and the star of this article RabbitMQ.
RabbitMQ is an open-source message broker that supports multiple messaging protocols. It's used to handle asynchronous tasks, decouple systems, and build distributed systems by allowing applications to connect and scale. Messages are sent to exchanges, which route them to queues based on routing keys and bindings. Consumers then process the messages asynchronously.
While RabbitMQ can provide some advanced features and options, in this tutorial we will just stick to basic publish and consume messages in a simple queue without any routing.
I will be using the .Net SDK for this tutorial. However, you can follow this tutorial using other SDKs such as Python, Java, Javascript, etc.
That being said let's dive into this rabbit hole and start right away with setting up our broker.
1.Setting Up RabbitMQ 🐰
I have talked before about how to make a YAML file to run containers in my previous post Run Multi-Container Applications with Docker Compose. This is the way I will run RabbitMQ using Docker Compose so my YAML file will look as follows.
version: '3'services:rabbit-mq:image: rabbitmq:3-managementcontainer_name: rabbit-mqhostname: rabbit-mqports:- "30001:5672"- "30002:15672"
You will need internet connection to pull this image (which includes a management console) from the internet and you will need to list two ports, one for management and communication (the one mostly used) and the other one for configuration.
So, just run docker compose up in your cmd after navigating to the directory where this docker-compose.yml file exists, and your console should tell you that RabbitMQ is up and running and you can make sure by checking Docker Desktop or simply running docker container ls in your cmd and see if your container is running or not. If your container is up and running, then it's time to visit the management console.
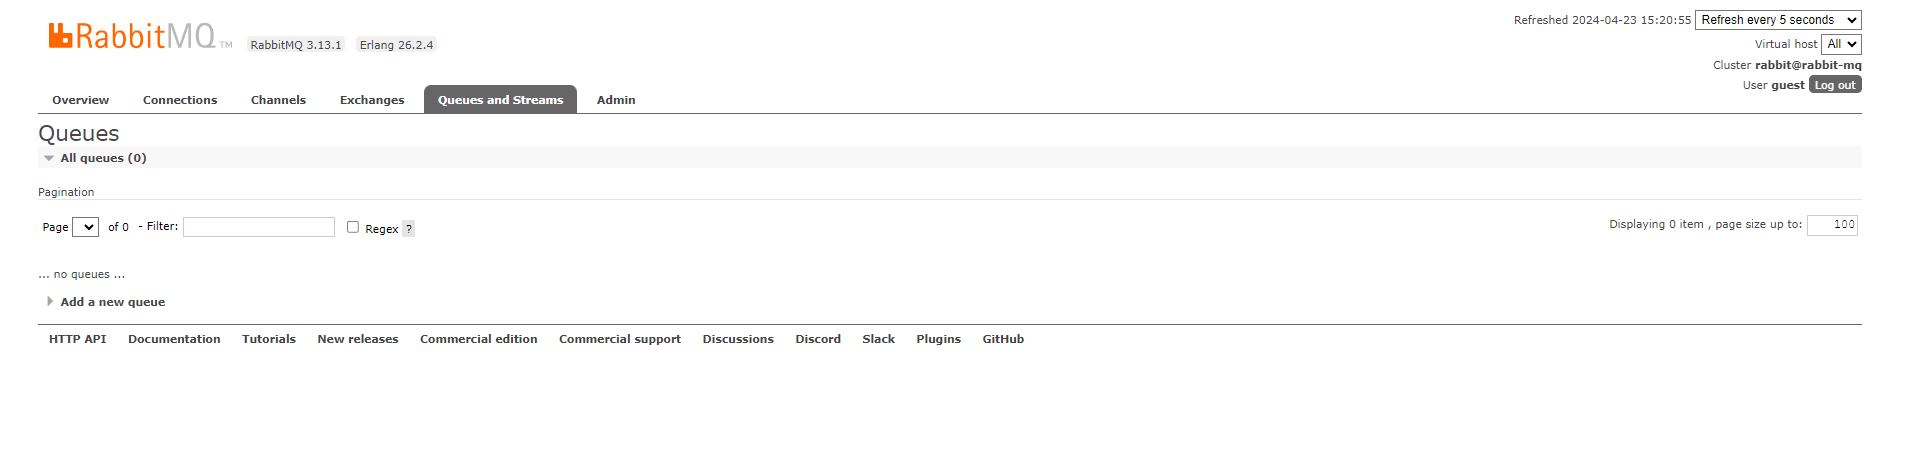
If you follow the same YAML file I created, then your RabbitMQ image should be running on localhost:30002 which is what you should access through your address bar where you should find the following screen.
If you follow the same YAML file I created, then your RabbitMQ image should be running on localhost:30002 which is what you should access through your address bar where you should find the following screen.

2.Publish Messages 🖅
We'll follow the traditional clean architecture when setting up these services so let's start first with a model that we add to our domain layer where we define a sample model of our messages that we are going to communicate with.
namespace Domain.Models{public record Message{public string Name { get; set; } = string.Empty;public int Number { get; set; }}}
It's just a simple record where we have a number field and name field just to simulate a real domain model. Now that we have a model that we can use let's define the methods that we are going to need from this RabbitMQ service.
using Domain.Models;namespace Playground.Contracts{public interface IRabbitMqService{public void CreateQueue(string name);public void PublishMessage(Message message, string queueName);public void ListenForMessages();}}
Notice that to simulate a real microservices structure the listener shouldn't exist with the publisher. However, this is only an example and if you wish to simulate a microservices architecture you should create another service in another project which has the listener but for simplicity I'm grouping all the services in one place, and you may apply your own changes if you want.
That being said now let's implement these services.
using RabbitMQ.Client.Events;using RabbitMQ.Client;using System.Text;using Domain.Models;using Newtonsoft.Json;using Playground.Contracts;namespace Playground.Implementations{public class RabbitMqService : IRabbitMqService, IDisposable{private readonly ConnectionFactory _factory;private readonly IConnection? _connection;private readonly IModel? _channel;public RabbitMqService(){_factory = new ConnectionFactory() { HostName = "localhost", Port = 30001 };_connection = _factory.CreateConnection();_channel = _connection.CreateModel();}public void ListenForMessages(){var consumer = new EventingBasicConsumer(_channel);consumer.Received += (model, ea) =>{var body = ea.Body.ToArray();var message = Encoding.UTF8.GetString(body);Console.WriteLine("Received {0}", message);};_channel.BasicConsume(queue: "hardcode",autoAck: true,consumer: consumer);}public void PublishMessage(Message message, string queueName){using var connection = _connection;using var channel = _channel;var messageJson = JsonConvert.SerializeObject(message);var body = Encoding.UTF8.GetBytes(messageJson);channel.BasicPublish(exchange: "",routingKey: queueName,basicProperties: null,body: body);}public void CreateQueue(string name){using var connection = _connection;using var channel = _channel;channel.QueueDeclare(queue: name,durable: false,exclusive: false,autoDelete: false,arguments: null);}public void Dispose(){GC.SuppressFinalize(this);if (_channel != null && _channel.IsOpen){_channel.Close();}if (_connection != null && _connection.IsOpen){_connection.Close();}}}}
Okay, now let's tear this implementation piece by piece:
- CreateQueue: This function will allow us to create a queue programmatically after being provided a name for that queue. The other options are left for their default values to ensure simplicity but here is what each option represents:
- queue: This is the name of the queue. It's a string that you provide.
- durable: If this is set to true, the queue will survive a broker restart. This means that even if the RabbitMQ server is restarted, the queue will still exist. If it's false, the queue will be deleted when the server restarts.
- exclusive: If this is set to true, the queue can only be used by the current connection and will be deleted when that connection closes. This is useful for temporary queues that are exclusive to a particular connection and are deleted when the connection is closed.
- autoDelete: If this is set to true, the queue will be deleted when the last consumer unsubscribes. If it's false, the queue will remain declared even if there are no consumers subscribed to it.
- arguments: This is a dictionary that can contain additional optional parameters for more advanced scenarios. For example, you can set a message time-to-live (TTL), configure the dead-letter exchange, set a maximum length for the queue, etc. If you don't need any of these advanced settings, you can pass null for this parameter.
- PublishMessage: This will allow us to publish messages to a certain queue name (without routing because as I said this is a straightforward example that leaves out the advanced features of RabbitMQ and only focuses on simple queue interactions.
Before you publish your model, you have to serialize it first and I do so using JsonConvert from Newtonsoft and I can tell you from experience that the more complex your model is the more time it takes to serialize or deserialize messages.
And this is why it's very important to pair your message broker with a file hosting service and only store simple key elements in the message and leave the heavy baggage to a service that can handle bulky data. And then the consumer should fetch the data using the key information obtained from the message. A common example is pairing SQS with S3 buckets.
Let's also see what each option means when publishing a message
- exchange: This is the name of the exchange to which the message is published. An exchange is a routing agent in RabbitMQ that takes messages from producers and pushes them to queues depending on rules defined by the exchange type. If you provide an empty string (""), the message will be sent to the default exchange.
- routingKey: This is the queue name where the message will be sent. In the context of the default exchange, the routing key is actually the name of the queue.
- basicProperties: This parameter allows you to set various properties for the message, such as content type, content encoding, priority, delivery mode (persistent or not), message id, and so on. If you don't need to set any properties, you can pass null for this parameter.
- body: This is the actual message that you want to send. It's a byte array, so you can send any kind of data as long as you can convert it to a byte array. In our case, you're sending a JSON string that has been converted to a byte array.
Note that we used only one channel that we set up in the constructor of our service which allowed us to communicate with our RabbitMQ service running on the port we specified in our YAML file.
Perfect! Now we got everything we need to publish a message so let's go ahead see how to consume these messages.
3.Listen and Consume 👂📩
As you can see in the service above, I declared a listener function that establishes a connection with our broker and starts listening to a queue of a hardcoded name "hardcode" (not intended) and of course this acts as our consumer which as I said should be somewhere else because the publisher should not consume unless your business somehow wants to of course.
But this listener must be initiated in the porgram.cs as our program starts up to establish a consumer with the broker which is a thing you can also see from the dashboard.
In my receive event I do nothing but encode the message and print it so I can see it in my console however this is where you should process the message you have been waiting for.
I will postpone registering my consumer in my program.cs to allow messages to exist a little for you to see then I will register it so it can consume all the messages in the queue.
Notice how the Dispose function exists so that you can dispose of the listener when you wish to shut down your application.
Perfect! Now we're all set for the final step which is actually testing our application.
4.Does it Work? Or is the Broker Broken? 🔎
Okay, now let's set up a nice little controller that will allow us to call our services but of course let's first register our service to inject it in our controller so simply add the following line in your program.cs.
// Add RabbitMqServicebuilder.Services.AddTransient<IRabbitMqService, RabbitMqService>();
Great! Now let's create some simple APIs like the following.
using Domain.Models;using Microsoft.AspNetCore.Mvc;using Playground.Contracts;namespace HARDCODE.API.Controllers{[ApiController][Route("[controller]")]public class RabbitMqController(IRabbitMqService rabbitMqService) : Controller{[HttpPost][Route("create-queue")]public IActionResult CreateQueue(string name){rabbitMqService.CreateQueue(name);return Ok("Queue Created!");}[HttpPost][Route("publish-message")]public IActionResult PublishMessage(Message message, string queueName){rabbitMqService.PublishMessage(message, queueName);return Ok("Message Published!");}}}
Seems good! Now let's try to create a queue.

Okay I kinda trust you console, but is it really created? Let's check the dashboard!


Wait! The number of messages still seems to be zero. So, what went wrong?
Okay, I got it! I had a typo in my queue name when I published the message I wrote "hardcola" instead of "hardcode".
Obviously, I did this whole act on purpose to show you that if you publish a message to a queue that does not exist, nothing will go wrong.
Obviously, I did this whole act on purpose to show you that if you publish a message to a queue that does not exist, nothing will go wrong.
So, you have to be very sure of your queue name, but actually there are ways that can help you avoid this, and I will be talking about it in another post.
Anyway, let's fix our typo and republish our message with the right name this time and we should find one message in our queue like this.

// Listen for messagesvar rabbitMqService = new RabbitMqService();rabbitMqService.ListenForMessages();
After registering your listener, you should find this in your dashboard after you start your application.

Great! Now let's take a look at your application's console to see if anything was logged after the consumer has connected to the broker.
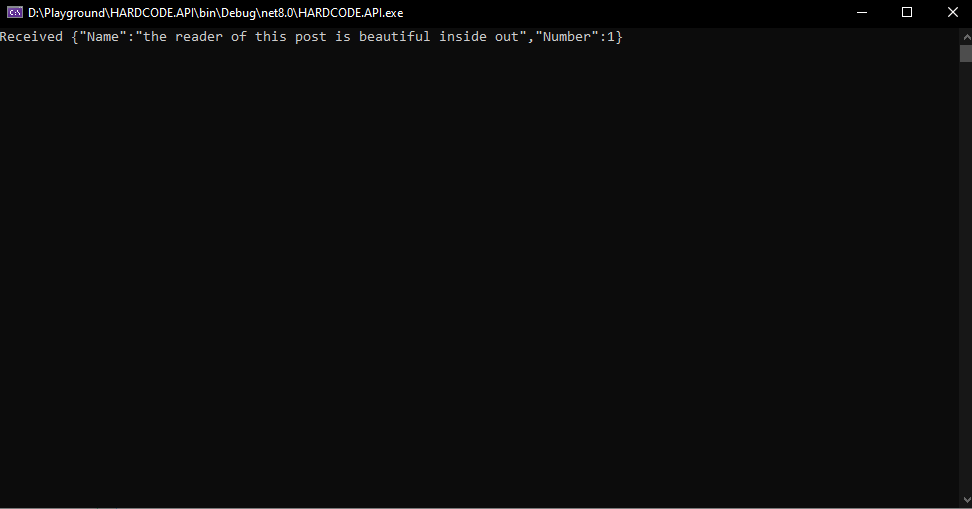
Seems like our message was consumed successfully and if you check your management console again you will find that the number of messages became zero again.
Well, that seems to be all of it. I think now you know enough about RabbitMQ to dig deeper into the rabbit hole and experiment with more options and advanced topics like fan-out, dead letter queues and channel events such as Basic Return which I will be discussing in a later post.


Comments
Post a Comment