RabbitMQ’s Lost & Found: 2 Different Techniques to Rescue Unrouted Messages 📬

RabbitMQ is often compared to as a post office. And this post office has multiple postmen (Exchanges) and each exchange is responsible for a number of mailboxes (Queues) and each postman has his own style of delivery (Exchange Types).
Well, the postmen of RabbitMQ are by default careless. So, if they get an address that they can't find, they just throw away the message. So, you have to set your ground rules and show them what to do if they get a non-existing address.
In my last RabbitMQ post Publish and Consume Messages Using RabbitMQ as a Message Broker in 4 Simple Steps 🐰 I showcased this problem when I deliberately sent a message to a non-existing queue name and as you can see in the post there was no exception thrown or anything. So basically, the message was a victim of fire and forget.
So, let's use the same setup as the previous post and let's try two techniques that could help us avoid this problem. Our aim is to at least log any message that did not route to any queue.
I first want to clarify that this is not a Dead Letter Queue pattern. Because dead letters are the messages that have been negatively acknowledged (nacked) or rejected by the consumer. Which is a topic that I will discuss in an upcoming post.
That being said, let's go ahead and see how to rescue the messages that didn't make into any queue. And we will start with a very basic approach.
1.Basic Return Event Handler 🔙
Adding an event handler is something that we've already tried in the previous post when we added the Receiver event handler to the Consumer.
So, all we need is to add another one with the same approach but instead of adding the event handler to the consumer we'll add it to the Channel we're using to communicate with the broker.
To do so just add the following code to your RabbitMqService constructor we implemented in the previous post.
_channel.BasicReturn += (model, ea) =>{var body = ea.Body.ToArray();var message = Encoding.UTF8.GetString(body);Console.WriteLine("Message returned: {0}", message);};
This way your event handler will be added to your channel once your service is registered.
It's also very important to note that we also need to set the Mandatory flag in the BasicPublish function to true.
So, let's try to use the same API we used in the previous post to publish a message to a non-existing queue name again and let's see if anything is printed in our application console.
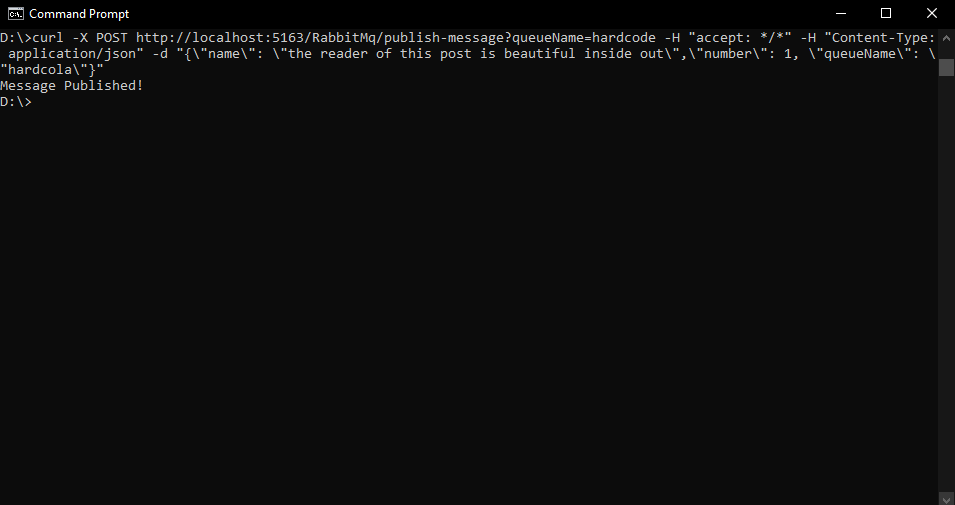
As you can see the message was sent successfully to the broker but was it routed or not?

Obviously, it was not routed because I entered a non-existing queue name and as you can see our event handler worked and the message did return and got printed here in the console.
You can now replace the console logging with actual logging or any other logic to handle the returned messages that failed to be routed.
You can now replace the console logging with actual logging or any other logic to handle the returned messages that failed to be routed.
Okay, but what if this channel did not care about handling returned messages? What if this should be the concern of a separate service that is for all we know can be a Node JS, Python or Java for example.
This is why we need another approach, an approach that redirects all unrouted messages to one place.
2.The Lost & Found Queue 📮
Now going back to our post office analogy let's imagine that instead of telling the postmen to return any lost mail back to the office they came from, you tell them to go to a specific office responsible for lost mail. This is exactly what we're going to do by setting up an Alternate Exchange.
In the previous post we've skimmed though the concept of Exchanges because we used direct communication between the publisher and the queues to send a message
But it's important to know that if you want to communicate with multiple queues, you should bind them to an Exchange and define how this exchange will communicate with these queues whether it's
- Direct: Where you communicate directly with a certain queue. Which is like the postman sending a specific message to your house.
- Fanout: Where you send the message to all the queues bound to this exchange. Which is like the postman sending a message to all the houses in his route.
There are also Topic and Headers but let's focus on those two exchanges in this tutorial for now.
Okay, so to start we have to declare first the Alternate Exchange in which should typically be of type Fanout which will make it route any message that fails to route to all the queues you bind to this exchange.
Because declaring Exchanges and Queues is idempotent which means you can keep declaring them with the same parameter without any side effects. Which is one of the major perks of RabbitMQ.
This of course should happen in the constructor of your RabbitMqService class. And it's perfectly safe to keep declaring your queue each time your application runs.// Declare the alternate exchange_channel.ExchangeDeclare("alternate-exchange", ExchangeType.Fanout);
Because declaring Exchanges and Queues is idempotent which means you can keep declaring them with the same parameter without any side effects. Which is one of the major perks of RabbitMQ.
Perfect! Now that we've declared our Alternate Exchange we need to add it as args when declaring the main exchange that we will be using to publish normal messages.
This way RabbitMQ understands that if any message fails to to be routed to its queue for any reason it will be routed to this lost & found exchange which will in turn fan out to all the queues bound to it.// Declare the main exchange with the alternate exchange as an argumentvar args = new Dictionary<string, object>{{ "alternate-exchange", "alternate-exchange" }};_channel.ExchangeDeclare("main-exchange", ExchangeType.Direct, arguments: args);
So, let's declare the queues and bind them to their exchanges.
// Declare the main queue and bind it to the main exchange_channel.QueueDeclare("main-queue", durable: false, exclusive: false, autoDelete: false, arguments: null);_channel.QueueBind("main-queue", "main-exchange", routingKey: "");// Declare the alternate queues and bind them to the alternate exchange_channel.QueueDeclare("alternate-queue", durable: false, exclusive: false, autoDelete: false, arguments: null);_channel.QueueDeclare("alternate-queue2", durable: false, exclusive: false, autoDelete: false, arguments: null);_channel.QueueBind("alternate-queue", "alternate-exchange", routingKey: "");_channel.QueueBind("alternate-queue2", "alternate-exchange", routingKey: "");
Great! Now as you can see, I have declared two alternate queues and bound them to the Alternate Exchange to show you how fanning out will deliver the message to all both queues.
It seems like everything is set up I just need to add a minor detail here in the PublishMessage function I used in my previous post.
channel.BasicPublish(exchange: "main-exchange",routingKey: "",basicProperties: null,mandatory: true,body: body);
I added the exchange parameter because I want to publish my message using the main exchange which has the lost & found exchange. I removed the routing key because I bounded the queue with the exchange on an empty routing key.
All good! Let's get to testing our queues and see what happens!
First thing after we run our application, we're expecting to see our exchanges and queues in our management page because as we have implemented, they are initialized in the constructor which runs once the service is registered in our program.cs. So, let's open the management page like we did in the previous post.


Perfect! Seems like everything we need is already set up. Let's try to publish a message now to a non-existing queue. And what we're expecting is that the message should fan out to the 2 alternate queues which are bound to our Alternate Exchange.

Now let's take a look at our queues and see if the message was fanned out to the two alternate queues.

Very well! Looks like our unrouted message has found its way to the lost & found queues.
This concludes our tutorial on how to handle unrouted messages and as I said in the beginning this will not handle messages which have reached the consumer then the consumer decides to reject or not-acknowledge (nack) it due to an exception maybe because the data in the message failed some validation that the consumer performs. These types of messages are handled by a Dead Letter Queue (DLX) which I will discuss in a later post. Until then, enjoy messaging!
This concludes our tutorial on how to handle unrouted messages and as I said in the beginning this will not handle messages which have reached the consumer then the consumer decides to reject or not-acknowledge (nack) it due to an exception maybe because the data in the message failed some validation that the consumer performs. These types of messages are handled by a Dead Letter Queue (DLX) which I will discuss in a later post. Until then, enjoy messaging!


Comments
Post a Comment