Help Your Messages Find Peace: A Guide to Dead Letter Queues in RabbitMQ 💀✉️

Exceptions can happen anytime and if you don't know how to handle them, then you have got a problem. Or maybe you just haven't checked out my post about exception handling.NET Global Exception Handling: 3 Techniques Beyond Try/Catch Blocks.
Anyway, because of that you need to plan what to do if an exception happens during processing a message that you received from a RabbitMQ queue.
You have two options:
- Negatively Acknowledge (Nack) Using BasicNack: This method is more flexible. It allows you to negatively acknowledge one or more messages. It takes three parameters: the delivery tag of the message to nack, a boolean indicating whether to nack multiple messages, and a boolean indicating whether to requeue the message.
If the multiple parameter is true, all messages up to and including the one with the specified delivery tag are nacked.
If the requeue parameter is true, the nacked messages will be requeued. If it's false, the messages will be discarded or sent to a dead-letter queue, if one is configured. - Reject Using BasicReject: This method allows you to reject a single message. It takes two parameters: the delivery tag of the message to reject and a boolean indicating whether to requeue the message.
Same as BasicNack, if requeue parameter is true, the message will be requeued and may be redelivered to another consumer. If it's false, the message will be discarded or sent to a dead-letter queue, if one is configured.
Both are viable options to use when something goes wrong while processing a message.
It's important to note that if you choose to requeue your message instead of queuing it in a dead-letter queue you are risking an endless loop. Because the same consumer might also fail again due to some incorrect data in this message, or a validation error and this message will remain in the queue forever.
So, it's better to help this message find peace in a dead-letter queue instead of leaving it to haunt your queue forever 👻.
I will be using the same setup as my previous post RabbitMQ’s Lost & Found: 2 Different Techniques to Rescue Unrouted Messages 📬. So, please follow the steps in that post so that you can follow along smoothly with the following steps.
Declaring The Dead Letter Queue
Like my previous post I will add these declarations in the constructor of RabbitMqService class so that they get declared when my application runs.
As I said in my previous post declarations are idempotent and nothing will go wrong if you keep declaring the same queue or exchange.
However, if you declare it again using different parameters or args then an exception will occur, and you have to either remove the previous queues or exchanges manually from the management page or just restart your RabbitMQ container only if your queues and exchanges were NOT durable.
However, if you declare it again using different parameters or args then an exception will occur, and you have to either remove the previous queues or exchanges manually from the management page or just restart your RabbitMQ container only if your queues and exchanges were NOT durable.
That being said, let's go ahead and declare our needed queues and exchanges.
// Declare the alternate exchange_channel.ExchangeDeclare("alternate-exchange", ExchangeType.Fanout);// Declare the Dead Letter Exchange_channel.ExchangeDeclare("dead-letter-exchange", ExchangeType.Direct);// Declare the Dead Letter Queue_channel.QueueDeclare("dead-letter-queue", durable: false, exclusive: false, autoDelete: false, arguments: null);// Bind the Dead Letter Queue to the Dead Letter Exchange_channel.QueueBind("dead-letter-queue", "dead-letter-exchange", routingKey: "");// Declare the main exchange with the alternate exchange as an argumentvar exchangeArgs = new Dictionary<string, object>{{ "alternate-exchange", "alternate-exchange"},};_channel.ExchangeDeclare("main-exchange", ExchangeType.Direct, arguments: exchangeArgs);var queueArgs = new Dictionary<string, object>{{ "x-dead-letter-exchange", "dead-letter-exchange" }};// Declare the main queue and bind it to the main exchange_channel.QueueDeclare("main-queue", durable: false, exclusive: false, autoDelete: false, arguments: queueArgs);_channel.QueueBind("main-queue", "main-exchange", routingKey: "");// Declare the alternate queues and bind them to the alternate exchange_channel.QueueDeclare("alternate-queue", durable: false, exclusive: false, autoDelete: false, arguments: null);_channel.QueueBind("alternate-queue", "alternate-exchange", routingKey: "");
So, as you can see, I declared a dead-letter exchange and queue and bounded the queue with the main-queue while the alternate-exchange was bounded to the main-exchange. It's very important to know the difference otherwise your dead-letter queue will not function correctly.
I will be making changes to my ListenForMessages function I declared in my initial post Publish and Consume Messages Using RabbitMQ as a Message Broker in 4 Simple Steps 🐰 where I will be invoking a BasicReject to reject any incoming message so that it goes directly to the dead-letter queue bounded to the main queue. So, it will it look like this.
public void ListenForMessages(){var consumer = new EventingBasicConsumer(_channel);consumer.Received += (model, ea) =>{var body = ea.Body.ToArray();var message = Encoding.UTF8.GetString(body);// Reject a message_channel.BasicReject(deliveryTag: ea.DeliveryTag, requeue: false);Console.WriteLine("Message rejected {0}", message);};_channel.BasicConsume(queue: "main-queue",autoAck: false,consumer: consumer);}
Also, disabling the autoAck flag is important so that we get the ability to nack the message.
If you wish to nack the message instead of rejecting it just replace the BasicReject line with the following one.
If you wish to nack the message instead of rejecting it just replace the BasicReject line with the following one.
// Nack a message_channel.BasicNack(deliveryTag: ea.DeliveryTag, multiple: false, requeue: false);
Perfect! Now, our console should log the rejected message so that we can know that we have consumed the message and rejected it successfully. Now let's test our work!
Honoring The Dead
After we run our application let's see on the management page if our queues and exchanges were successfully declared or not.
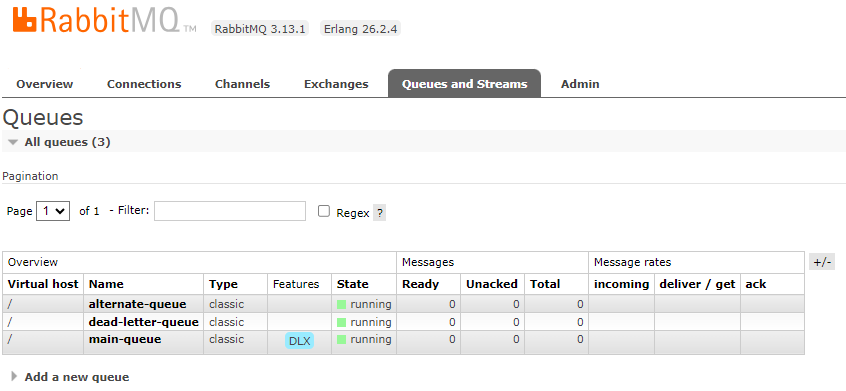
Everything seems to be set up nicely and notice how we got AE on the main-exchange which is the alternate-exchange and DLX on main-queue which is the dead-letter queue.
Now, let's test our dead-letter routing!
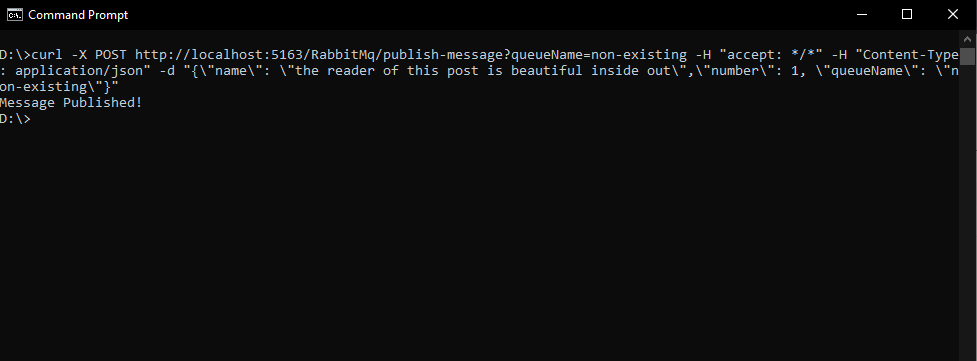
Let's start with publishing a message using curl again like the previous posts but one thing I want to point out is that there is no need for the queue name now in my PublishMessage API.
Because now the queue is bounded to the main-exchange on an empty routing key. But I still have the parameter in my API so I will just post a dummy name which will be ignored anyway.
Great! Now let's take a look at our application console.

Perfect! Our message got consumed and rejected just like we planned. Will we now see one message in the dead-letter queue?

Everything went according to plan and our rejected message finally found peace in our dead-letter queue.


Comments
Post a Comment